PC Memorial Hall Creation Guide
This guide shows PC users how to sign in and create a memorial hall. The screenshots use a dedicated tutorial account and a real memorial hall created...
This guide shows PC users how to sign in and create a memorial hall. The screenshots use a dedicated tutorial account and a real memorial hall created during the walkthrough.
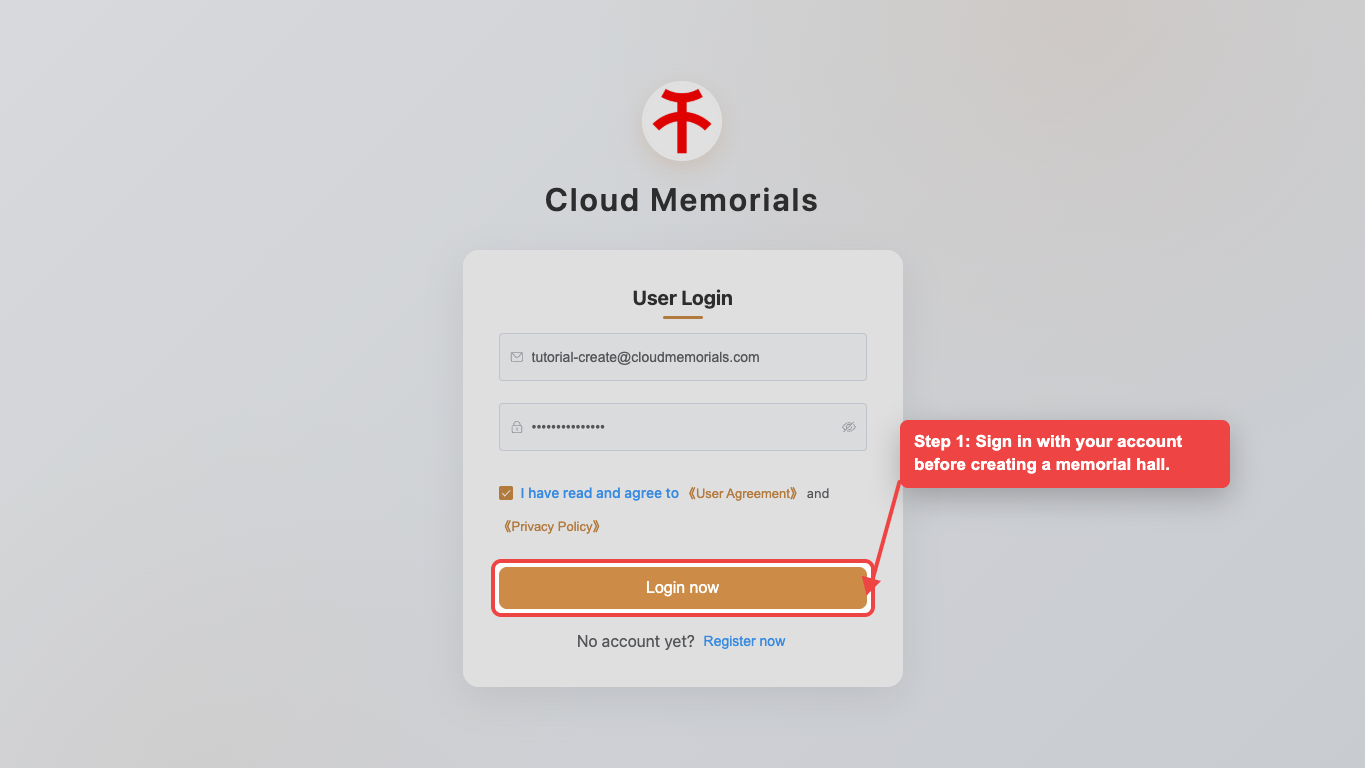
Sign in to your account
Open the PC login page and sign in before creating a memorial hall.
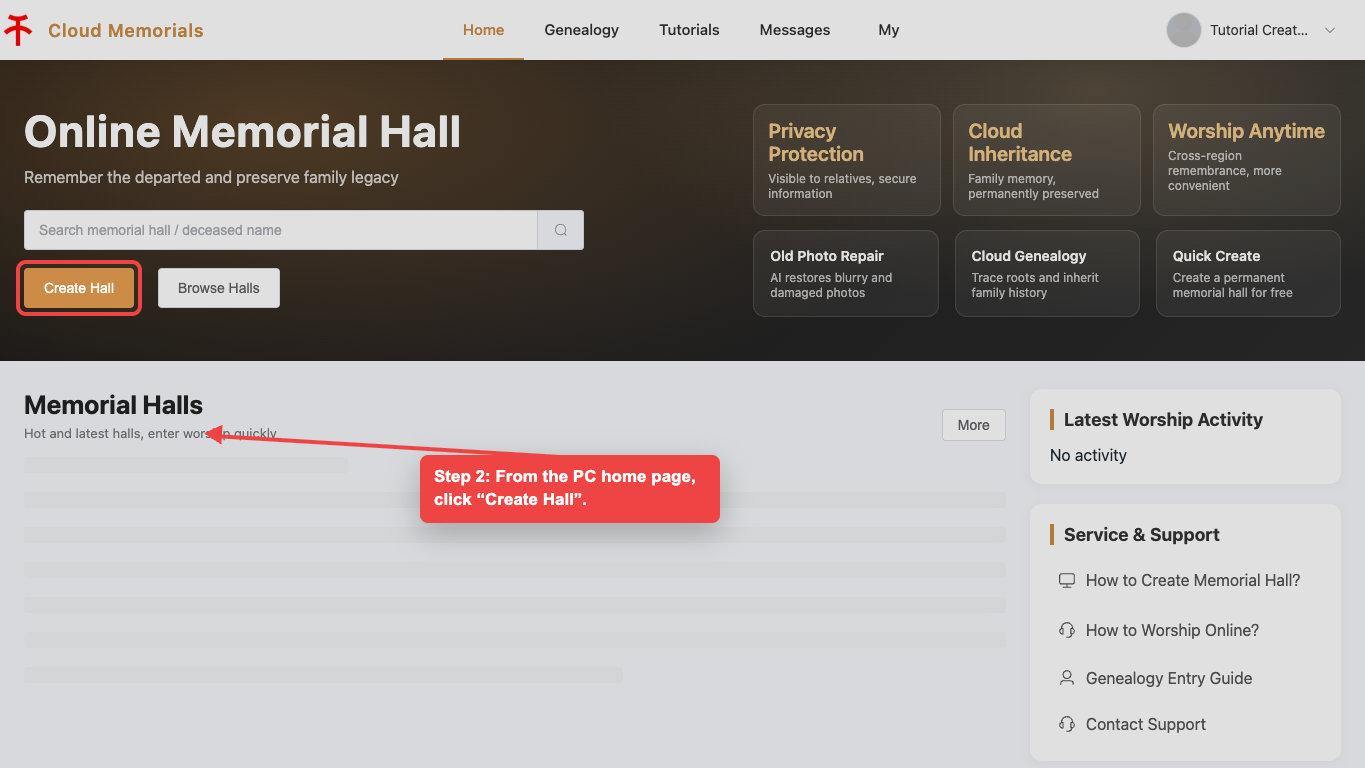
Open Create Hall
From the PC home page, click “Create Hall” to start the memorial hall setup flow.
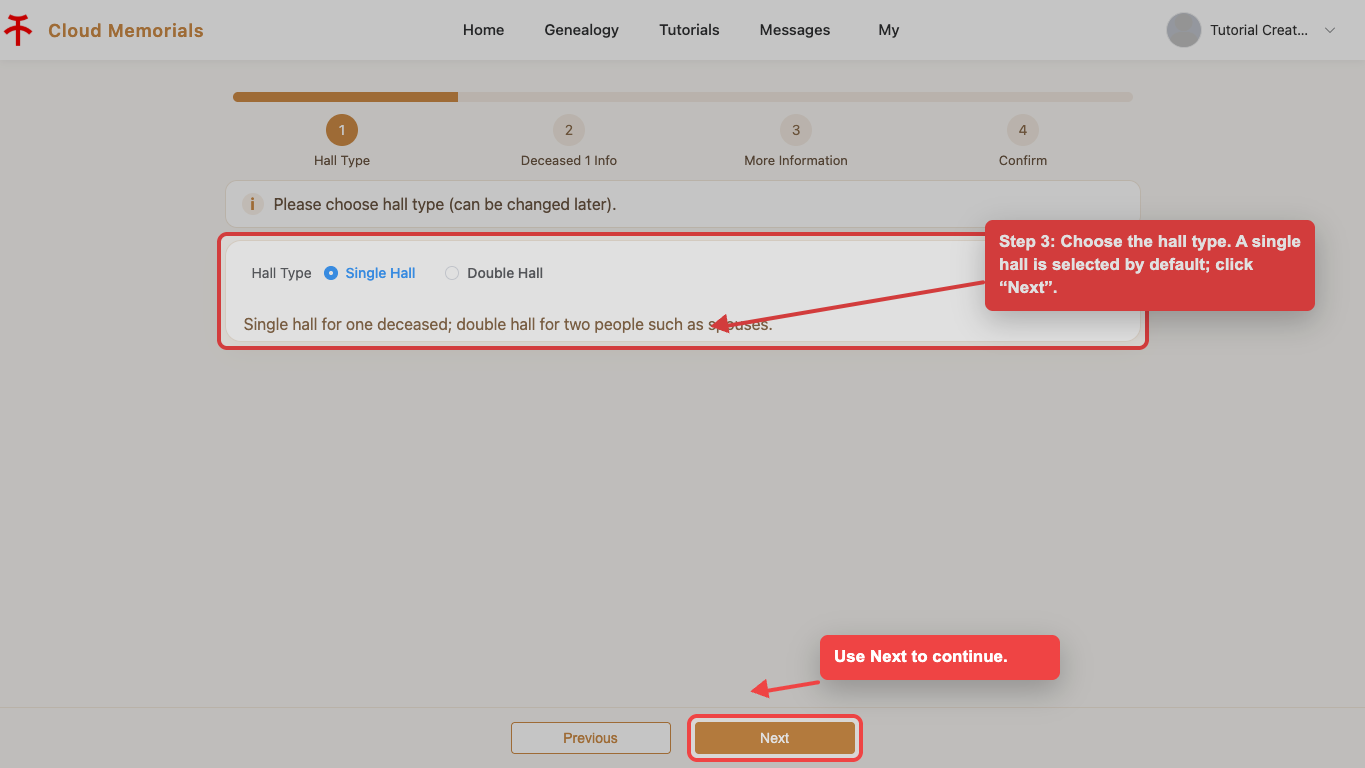
Choose the hall type
Select the hall type you want to create. A single memorial hall is selected by default, then click “Next”.
Enter basic deceased information
Fill in the deceased person’s name and select a gender. The portrait upload is optional.

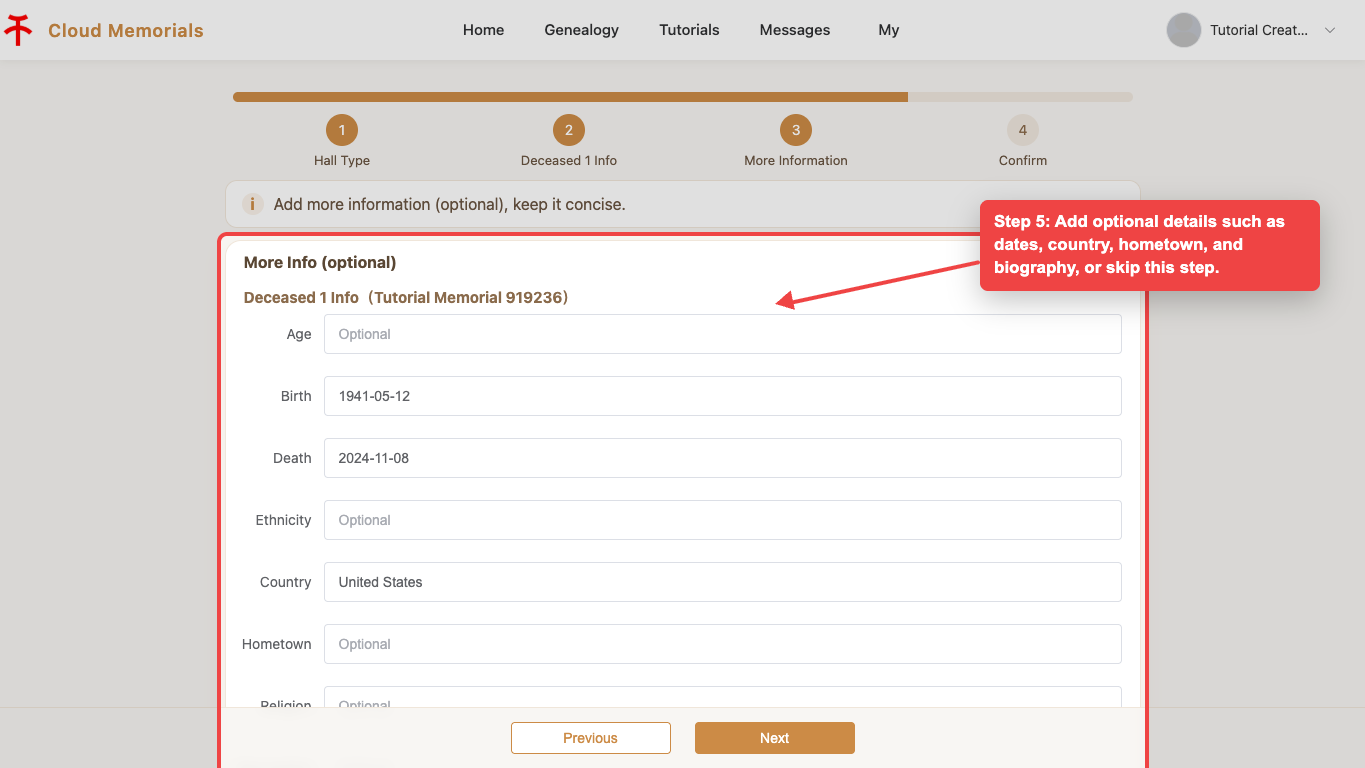
Add optional details
Add dates, country, hometown, biography, or other optional details if available, then continue.
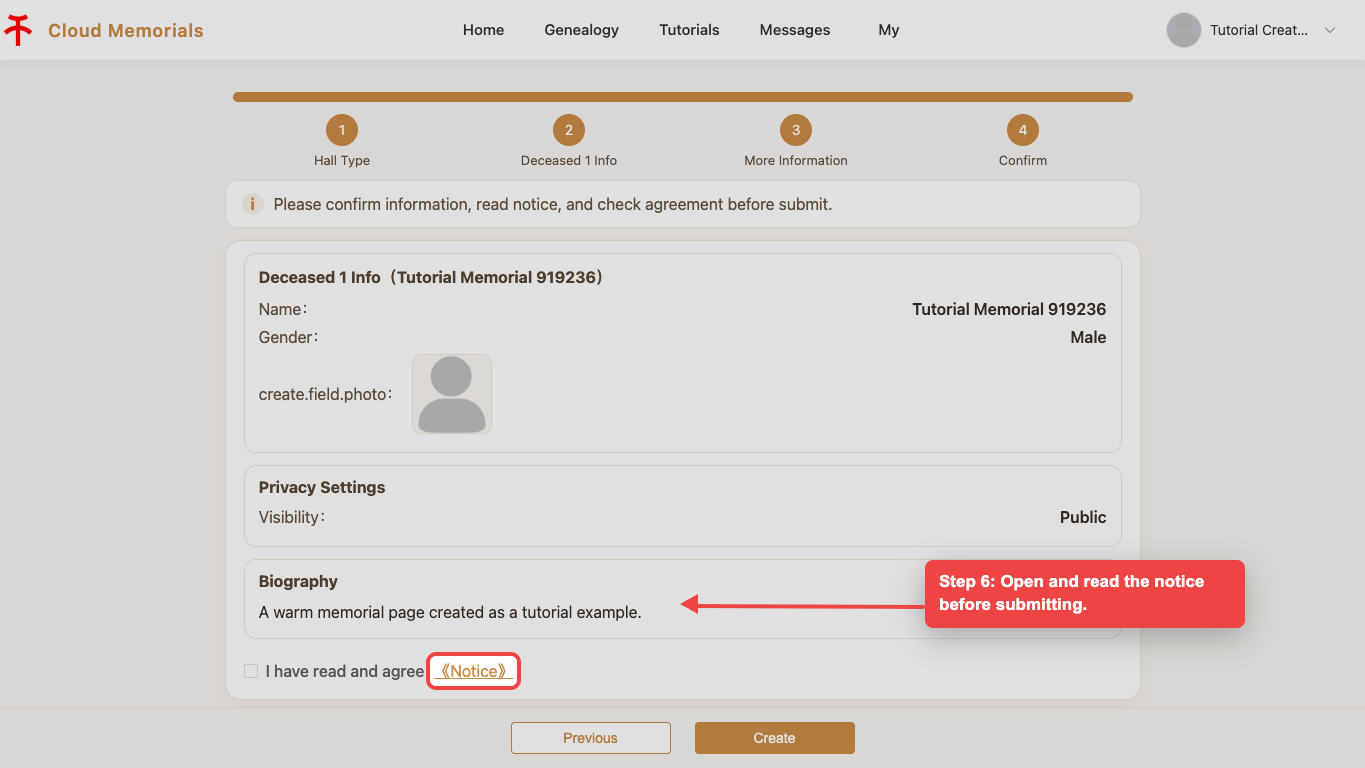
Open the notice
Before submitting, click “Notice” and review the platform requirements.
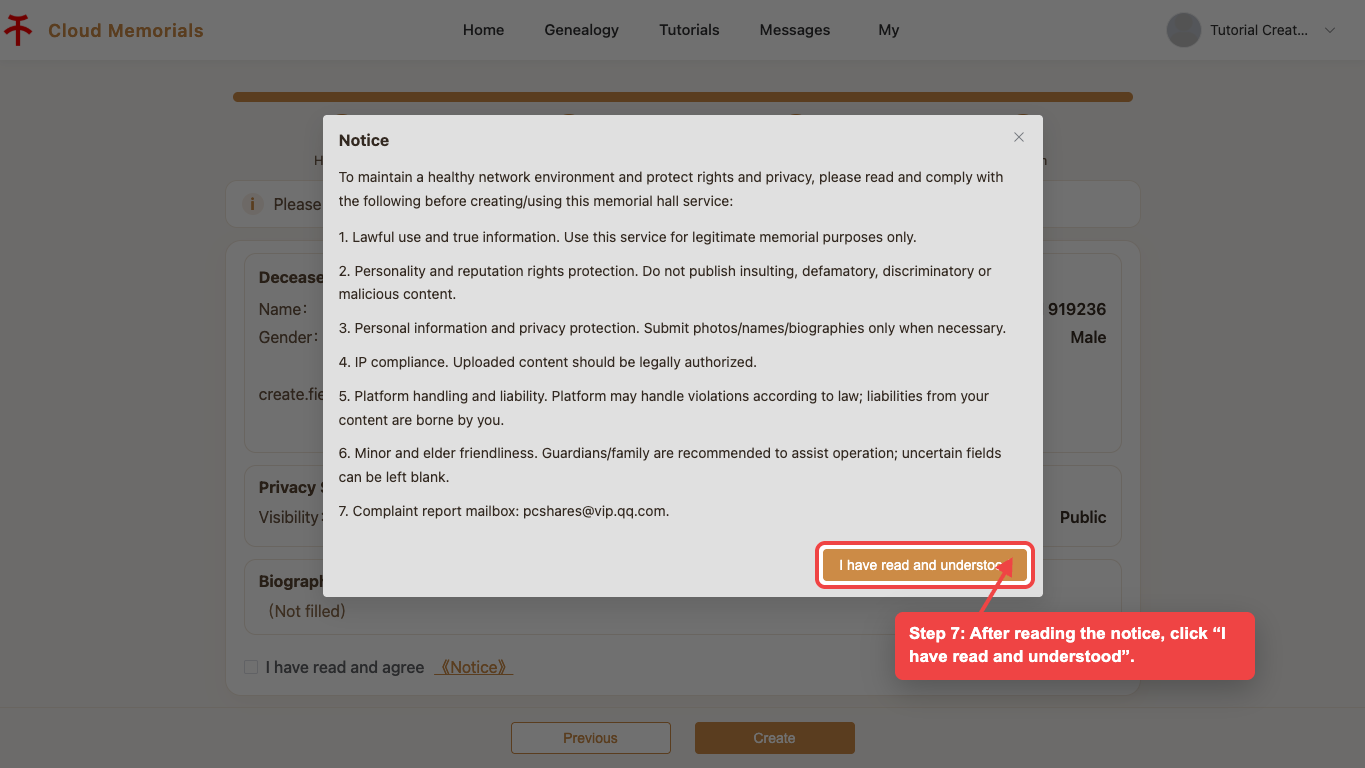
Confirm the notice
After reading the notice, click “I have read and understood” to return to the final confirmation step.
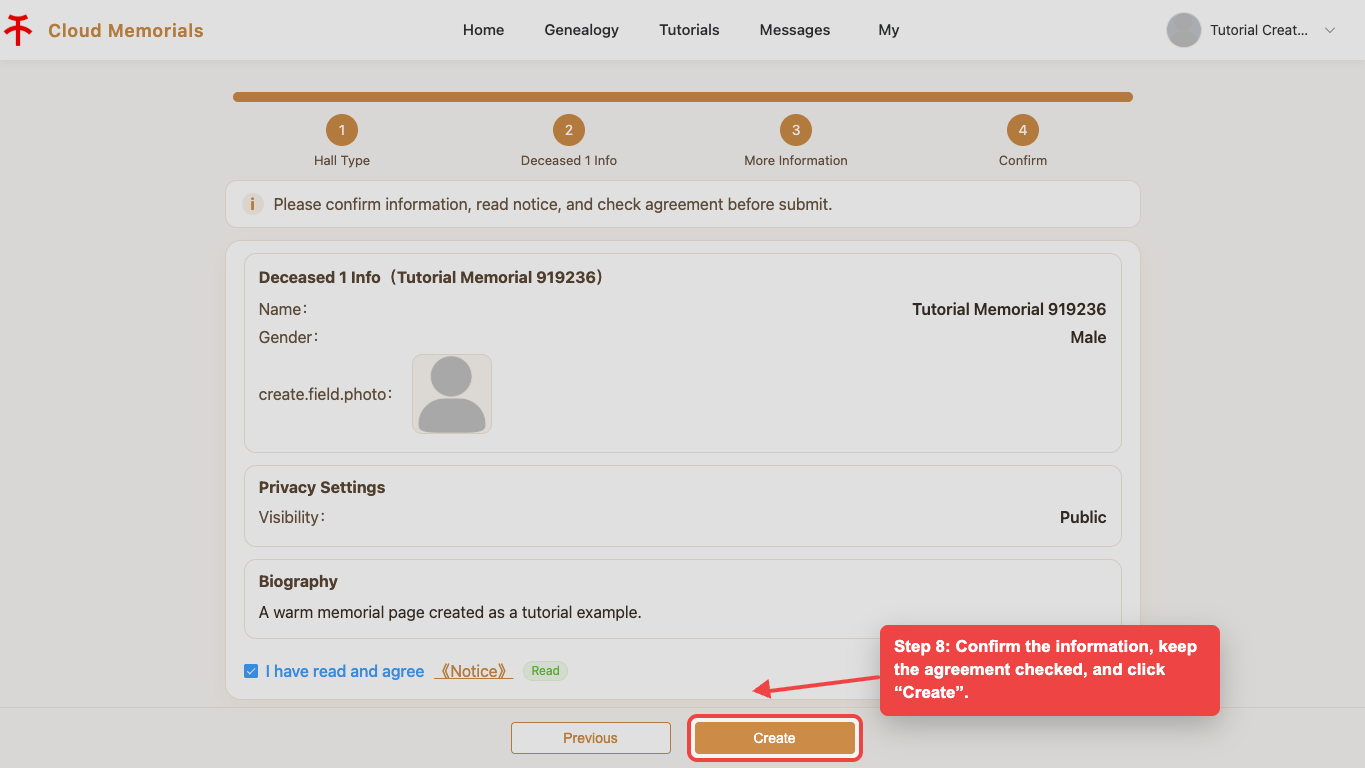
Submit the memorial hall
Confirm the information, keep the agreement checked, and click “Create”.
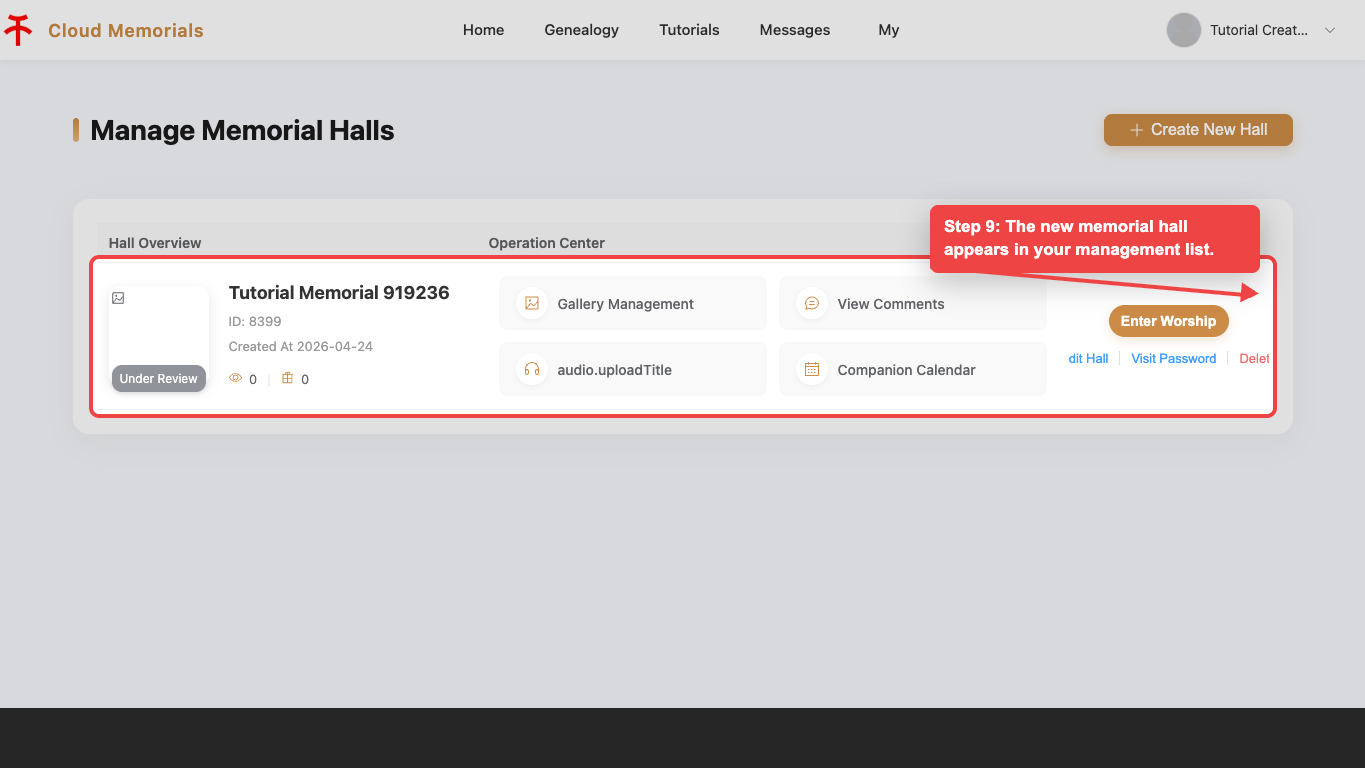
Check the management list
After creation, the new memorial hall appears in your management list.